Are you tired of expensive store bought wooden Christmas decorations? You’re in luck. Today, we are going to cover 4 DIY wooden Holiday decorations. The difficulty varies, so you should be able to find one to suit any expertise or lack thereof!

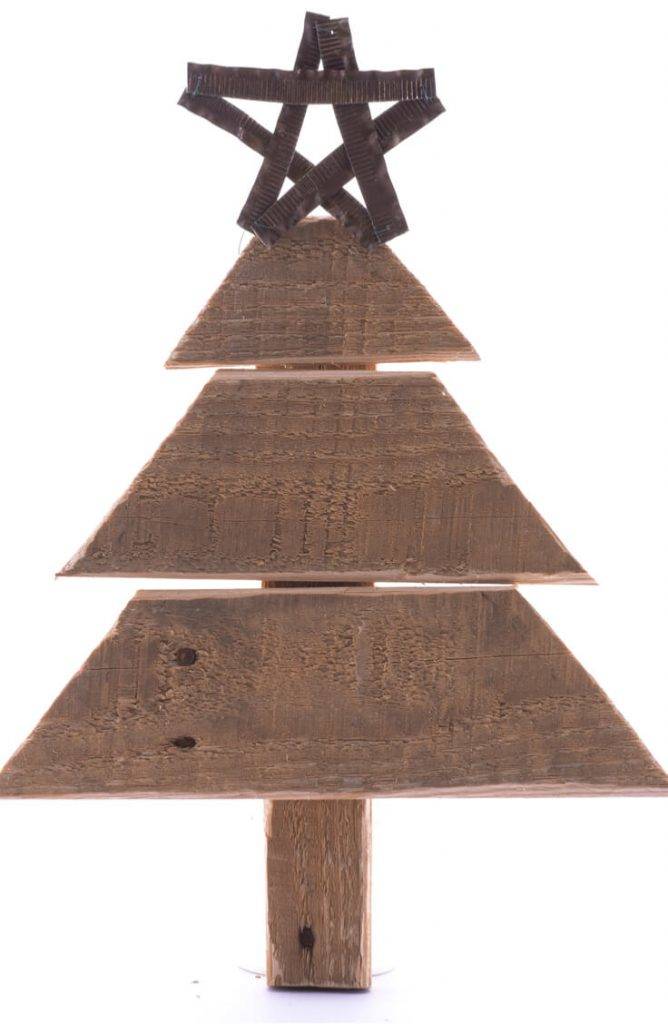
Pallet Christmas Tree
To obtain a pallet, call your local department, grocery, and hardware stores. Some throw or give them away if you are a customer and ask nicely. To get your kids involved, allow them to pick out and decorate the tree!
Materials
- 1 Pallet
- Thick log (for the tree base)
- Hammer
- Nails
- Twine or silver wire (match the color to your tree décor)
- Decorations
- Bulbs
- Lights
- Star for the top
- Anything else you want! Get creative!
- Sandpaper (optional)
- Wood stain (optional)
Instructions
- Cut or pull off the excess parts of your pallet. You want to be able to stand it up so that it’s as tall as possible. Ultimately, it will lean against a wall.
- Decide on the shape of your tree, and hammer nails where the 3 corners will be. Don’t forget to start where the top of your log (the base of the tree) stops!
- String the twine or wire tightly to make a Christmas tree shape.
- Now, hammer in nails on each pallet board on both sides up the tree by following the twine or wire.
- String twine or wire across each of the pallets and attach to both sides. These are what you will hang your ornaments and other trinkets from.
 String your lights up the tree in the usual style attaching the lights to the nails on their way up.
- Decorate!
- If you would like, you can stain the pallets before use. Pallets aren’t always the nicest color or in the best shape when you purchase them. You might want to sand the boards down and stain them. You can stain them any color, even a nice evergreen!
Candles and Logs
These little decorations look great on a mantle, windowsill, or as a table topper. You can even use them outdoors to line your walkway or porch. Did we mention they are incredibly easy to make?
Materials
- Different sized logs (you can get these in a hearty firewood pack, but you might have to saw them down to different sizes yourself)
- Small jars (these can be any size that looks good sitting on the logs)
- Candles (must fit into the jars or buy small candles already in jars)
- Optional extra décor
- Holly branches
- Pine cones
- Moss
- Ornaments
Instructions
- Stand the logs up in whatever formation you choose. This is similar to setting up different sized pillar candles.
- Place the candles in the jars and put one jar on top of each log surface.
- Decorate!
DIY Wooden Advent Calendar Tree
Forget about the lame advent calendars with gross chocolates you find in the stores. It’s way more fun to make your own! Whether you have kids or not, this cute advent calendar will bring joy to the Holidays.

Materials
- Wooden Slats:
- 1x: 16” long by 2.5” wide
- 1x: 20” long by 2.5” wide
- 1x: 24” long by 2.5” wide
- 1x: 28” long by 2.5” wide
- 1x: 32” long by 2.5” wide
- 1x: 48” long by 2.5” wide
- Wood glue
- Nails
- 25 rusty looking nails (these are referred to as antique nails unless you have real rusty nails)
- Tree topper
- Hammer
- Hanging system
- Felt pads for beneath chair legs
- 25 small bags (we chose muslin)
- Stencils, fabric stickers, and patches
- Goodies for the bags
Instructions
- If you plan on using stencils to put the numbers 1 – 25 on the bags, follow the instructions on the stencil kit. Don’t forget to put wax paper inside of the bags to prevent bleed through! If you are using stickers, simply press them onto the bags. If using patches, get out your iron.
- Place the longest piece of wood, 48 inches, vertical as the trunk of the tree. Starting at the top of the tree, measure 5 ½ inches down and nail on the shortest piece of wood. Proceed to nail down the rest of the slats from smallest down to largest. Don’t forget to measure 5 ½ inches between each piece of timber.

- Now you are ready to hammer in the antique nails. Put 3 into the shortest piece, 4 in the 20-inch timber, 5 in the next piece, 6 in the 28-inch, and 7 nails in the bottom slat. Try to put these an equal distance apart.
- Nail on your tree topper.
- Attach the hanging system to the back of the calendar.
- The felt pieces should be placed on the back of the wood where it could scrape the wall.
- Hang the calendar in the desired location.
- Put treats in the advent bags and hang them up on the tree!
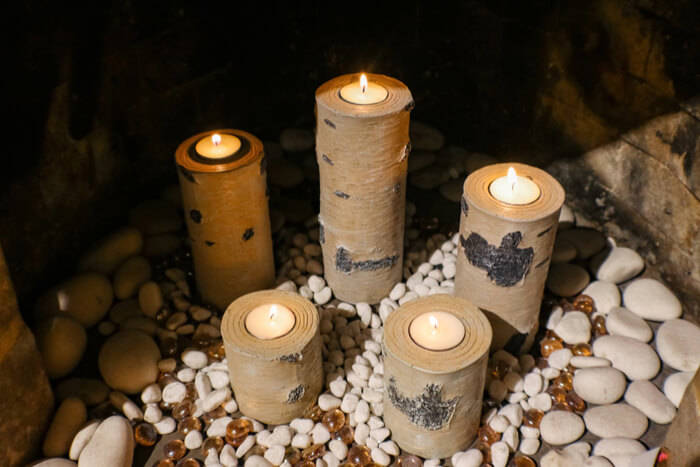
Candles in Logs
Some people have an objection to putting candles on top of logs. This DIY craft allows you to put candles in logs! It’s easy to work these into your Christmas decorations!
Materials
- Logs (same or different size doesn’t matter and it’s completely up to your sense of style)
- Tealight candles
- Drill
- Decorations
- Holly branches
- Pine cones
- Moss
- Ornaments
Instructions
- Drill holes big enough for the tealight candles to sit down into. It’s better to have the candle stick up than encased in the logs.
- Place the candles down into the logs.
- Arrange the logs as you please.
- Decorate!
Pineca.com is a well-known manufacturer of wooden garden buildings. Visit the website and find out more about production and what is on stock!