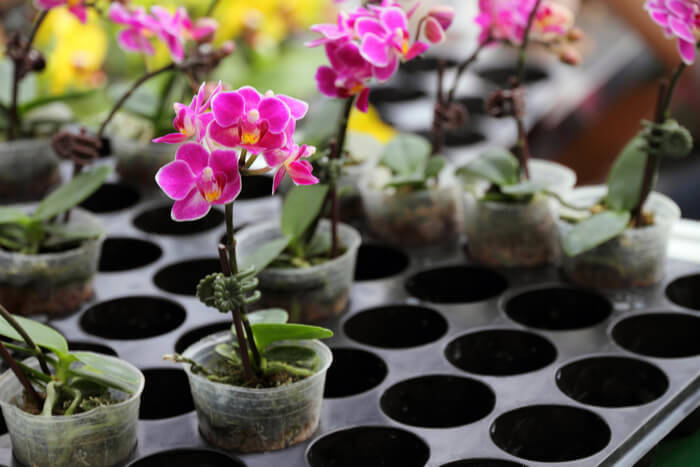
Orchids are beautiful. There is no denying that fact. However, most people view this plant as the most difficult flowers to go. We are here to tell you that is just not true! Orchids do not have to be a mystery, or a pain in the butt.

In this article, we will cover a few of the ways you can grow these lovely plants in just a couple of steps. Before you know it, you will be a prize winning Orchid grower!
How to Plant Orchids: A Guide
The first step in planting Orchids is to choose a plant, and choose wisely. There are over 200,000 hybrid varieties of this flower, as well as over 30 different species. You should look for one of these flowers that will fit well with where you want to plant it: indoors or out.
Another thing you should figure out is how easy each variety is to grow. For beginners, we recommend picking Phalaenopsis, Paphiopedilum, or Cattleya. Keep in mind different species require different temperatures, humidity, and sunlight. Ask your local nursery for more details and to pick the right genus for you.
1. Choose the correct type of soil. These flowering plants need to be potted in a porous mixture. If you use regular potting mix, your Orchid will die and fast! You can buy specially made Orchid soil, or make your own.
2. There are 2 ways of making your own soil. The first is a fine potting mix and it is for Orchids that like moisture. Add in 1 part fine grain charcoal, 1 part perlite, and 4 parts fine fir bark or coco husk.
The second method is a medium potting mix and it is for most of the Orchids you will come in contact with. It drains much better. Add 1 part perlite, 1 part medium charcoal, and 4 parts medium grain fir bark or coco husk.
3. Pick your pot. There are a lot of containers out there that are specially made for Orchids. However, the most important things to remember is that these flowers enjoy being root bound. Most of the time, you can pick a smaller pot. Here are some examples:
• Clay pots with many holes in the sides.
• Clear plastic pots with drainage holes at the bottom.
• Wooden pots made of rot-resistant wood. These must be lined with sheet moss prior to planting.
• Net pots allow Orchids to breathe naturally. These are just as they sound: made of wire mesh.
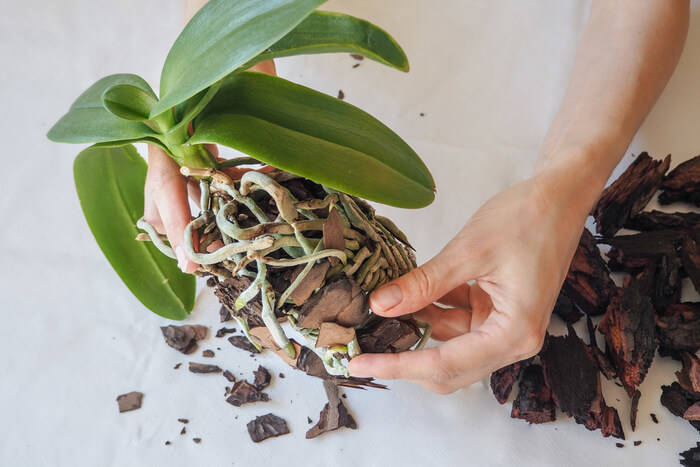
4. Pot the plant. The first step is to cut off any dying, dead, or rotting roots. Next, separate the roots so they have room for circulation. The older roots should be placed in the bottom of the pot and the newer roots positioned out the sides.
5. Add your porous soil. Do not add too much, as the root system should barely have any dirt on top of it. Do not tamp down or force anything. These are delicate plants.
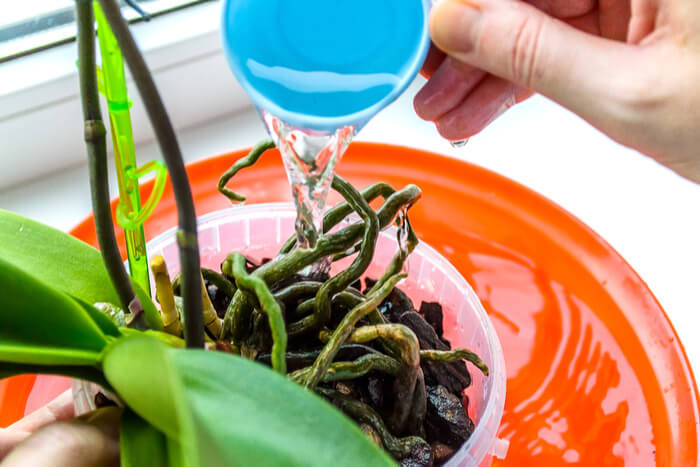
6. Water your orchid thoroughly.
Note: Another great resource is your local Orchid growing society. If anyone knows these flowers, it is this group of people!
How to Care for Orchids
The easy part is over. Now comes caring for your Orchids. It’s no surpise that these flowers need more care than other plants. Just how much care do they need? Let’s find out!
• Put your newly potted plant in strong, yet indirect sunlight. This is best achieved by a east or a south facing window. If you must use a westward window, be sure to cover it with a semi-transparent sheet to keep your flowers from burning.
• Keep your log home at a decent temperature. This translates to between 60 and 75 degrees F. That’s 16 to 24 degrees C. The temperature difference between night and day should be 10 to 15 degrees for perfect growing conditions. This promotes new buds to grow, and should be done every fall and every winter.
Dark green leaves mean that your Orchid is not receiving enough sunlight. Red, yellow, or brown leaves means too little sunlight. They should be the color of a light green with some yellow undertones.
• Water once a week. If you have to, err on the side of not watering enough. Too much can easily kill an Orchid. Let the potting mix dry completely before watering again.
• Use fertilizer that is specifically for these flowers. Anything else will certainly kill them. Even fertilizing too much can hurt them. You can apply 20-10-20 fertilizers at max once a week as long as it is diluted to ¼ strength. Too much will burn the roots, too little will keep flowers from blooming.
• Use a small fan on low to promote circulation, or a ceiling fan on high. However, do not point the fan right on the plant. This is an extremely important part of how to plant Orchids. They need good air circulation, which is why many of the pots have holes throughout.
• Get the humidity up. If you have a humidifier, that’s great! Simply place it near the Orchid and get it up to 40 to 60 percent humidity. Another method is to put a tray of pebbles submerged in water right near the plant. A final method is to spray the orchids with water once a day. If you aren’t sure, buy a humidity testing kit!
• Prune your flowers as soon as they have died. In fact, Orchids only flower one time per stem, so you should cut the whole stem as close to the trunk of the plant as you can. Be sure to sterilize your cutting tool by boiling it in hot water first!
• If you notice any insects, remove them by hand. Be sure to check the tops and bottoms of leaves, as well as the stalks and flowers.