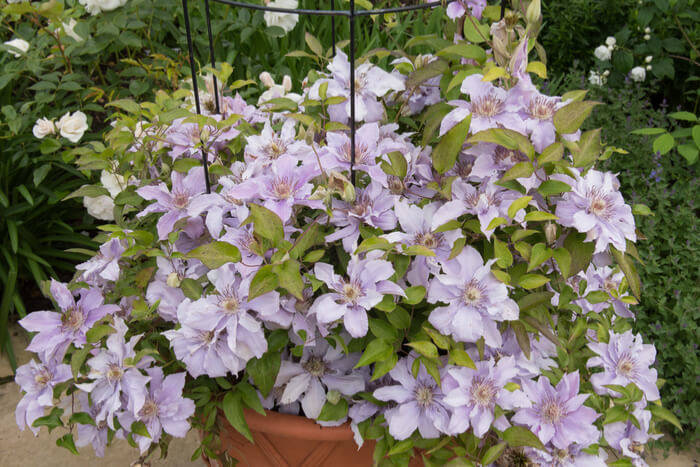
Clematis are vines that are impossible not to fall in love with. They come in a wide variety of different colors and sizes. There is literally something for everyone. However, they can be a bit difficult to grow if you don’t know what you are getting into.
In this article, we will walk you through the steps of how to plant clematis. By the end, you will realize it isn’t as difficult as you think it is. With some patience and time, anyone can grow this gorgeous vine for the full 80 years!
How to Plant Clematis: A Guide for Beginners
Step 1: Choose Your Variety
Clematis vines are all the rage lately. Everyone seems to be growing them and that’s good news for you. That means the garden stores you frequent should have a variety in stock. It also means specialists will know more about them and can help you choose.
It is best to choose a plant that is 1 or 2 years old. It takes them a few years to bloom, so it’s best to start with an older one.
There are a few common types you should be familiar with before going to the nursery:
- Apple Blossom – This is an evergreen clematis, making it perfect for anyone that wants their vine green all the time! The flowers are small and white.
- Niobe – This container-sized plant has eye-popping red flowers.
- Nelly Moser – A very popular choice. It is one of the best for beginners because it is the easiest to grow. The flowers are pink and they are large.
- Princess Diana – Named after the beloved woman herself, this clematis does well in hot places. The flowers are pale pink and are shaped like a bell.
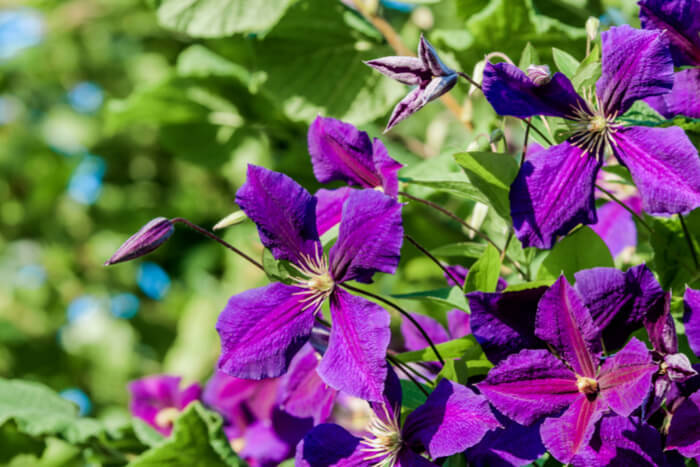
- Jackmani – One of the most common varieties. This vine grows fast and features dark purple flowers.
Step 2: Pick the Location
Clematis love full sun and they grow well in zones 3 through 9. Even though there is quite a bit of variety, all of these plants love the warmth and light. So, you will want to choose a place where the vines get a minimum of 6 hours of sunlight per day.
There is another thing this plant loves, and that is to have its roots in the shade. It is a tricky balance, but we have found that the plant should be uncovered from 4 inches off of the ground. If you don’t have a spot like this, you can use 4 inches of mulch or more to cover the roots.
One cool thing you can do is put your growing clematis near a tree, shrub, fence, trellis, or even wooden shed or wooden garage. Just make sure you plan on having that structure for a long time!
Step 3: Well-draining Soil
Whatever spot you choose, it should have well-draining soil. The best way to test this is by digging a 1-foot by 1-foot hole in the ground, pouring in water, and watching how well it drains. However, don’t go too far the other way with it. Sandy soil is too porous to hold enough water. Clay soil is too compact to drain well enough for your clematis.
The perfect soil drains slow and steady.
Step 4: Soil pH
Neutral or alkaline soil is much better than acidic soil. If your dirt’s pH is on the acidic side, add some wood ash or limestone. Mix it deep into the ground for best results!
Step 5: Dig the Hole
Go to your perfect location and dig a hole. It should be much deeper than the container the vine came in. How deep? You want the soil to come up to the first set of leaves.
Holes dug in clay soil should be dug a bit deeper. In sandy soil, you can keep the hole a bit more shallow. These small changes can help the roots grow big time.
Step 6: Enrich the Soil
After digging the hole but before putting in the clematis, add compost and organic fertilizer into the dirt. Mix it in around all sides using your hoe or shovel. Ensure it is mixed in so it can give nutrients to all roots in every direction.
Step 7: Put the Vine in the Ground
Remove the clematis carefully. You want to do minimal damage to the roots. When the ball is out, put it into the hole. Make sure the soil comes up to the first set of leaves. Adjust the level accordingly and put a stake in with the vine. This should stay for the first year until the clematis can get established.
Step 8: Mulch
This step isn’t necessary if your landscape offers 4 inches of shade for the bottom of the plant. To landscape, use organic materials and cover the ground around the roots. We recommend newspapers, straw, dry chopped fall leaves, or grass clippings. Whatever it is should cover the entirety of the root ball plus extra.
Tips to Take Care of Clematis
#1: Water Well
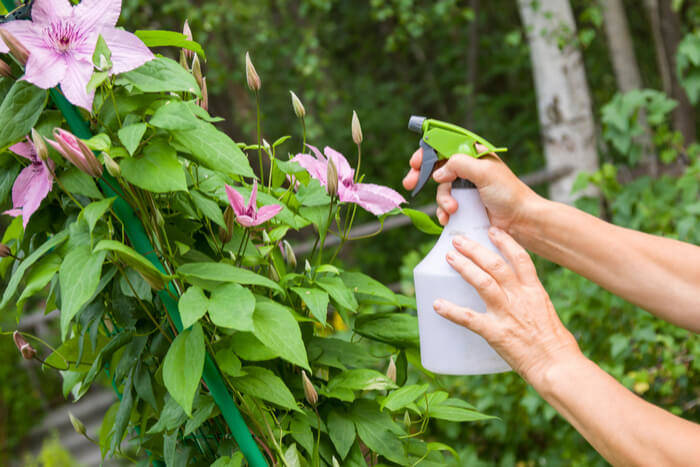
To check when the plant needs water, stick one of your fingers in the soil. It should hit moisture. If not, it’s time to water your clematis! Make sure to give it a lot of water, and try to do it in the morning. Watering at night can lead to insect infestations and root rot.
#2: Keep Mulching
Don’t fall behind on mulching, because the life of your flowering vine depends on it! Always keep 4 inches of mulch around the base and completely covering the roots. That means widening the area as your roots grow wider.
#3. Fertilize
After the first watering, we recommend you put your clematis on a watering schedule. Use 10-10-10 organic fertilizer once every 4 to 6 weeks. You can also give the roots an extra boost of nutrients by composting the plant’s base.